Hello everyone, welcome to my art blog!
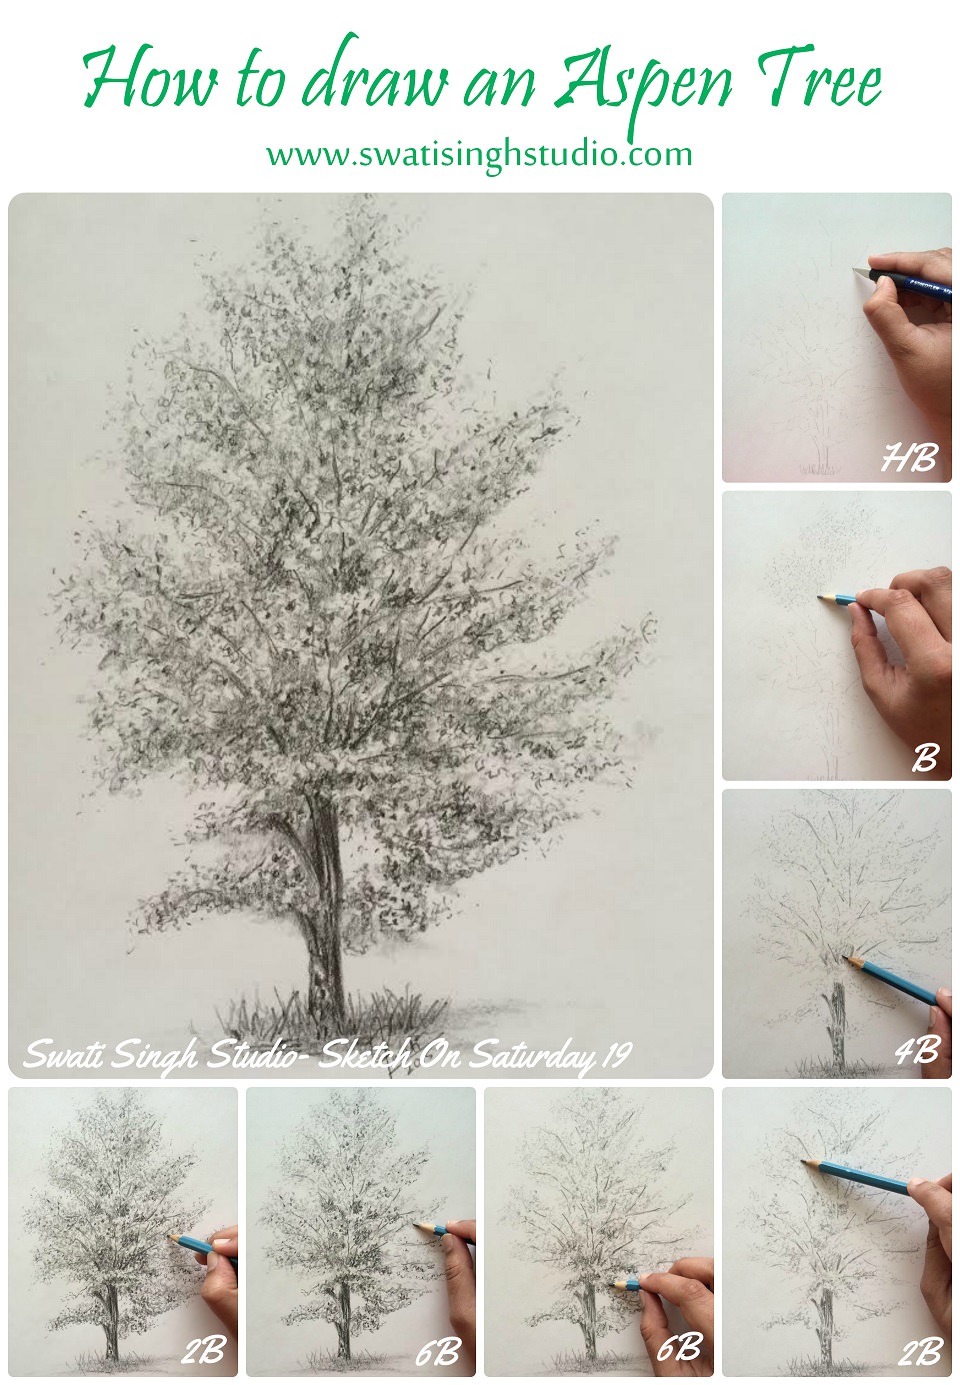
Last Saturday I shared the sketch of an Aspen tree in the “Sketch on Saturday” series. I am going to elaborate on the same in today’s post.
Interestingly this sketch took me way longer to complete than the previous sketches. The reason is because it took a slightly different approach from the rest.
I was going back and forth with my light and dark pencil shades to get the final look. It was not a straightforward technique of going from light to dark as we did in many of the previous sketches.
So I thought maybe I should share the process in detail with you all.
Let us look at the materials required:
1. A white sheet of paper (a sketching sheet or even a blank printing sheet will do),
2. HB, B, 2B, 4B, 6B pencils,
3. An eraser (optional),
4. A sharpener
It's time to get started!
Step1: With an HB pencil, start drawing the tree from the base. Draw the trunk and work your way up. Now lightly make a rough outline of the cluster of leaves on the branches. Keep the drawing very light at this stage. We are just trying to establish the leaves and branches here. This will help us see what the overall structure will look like in the end.
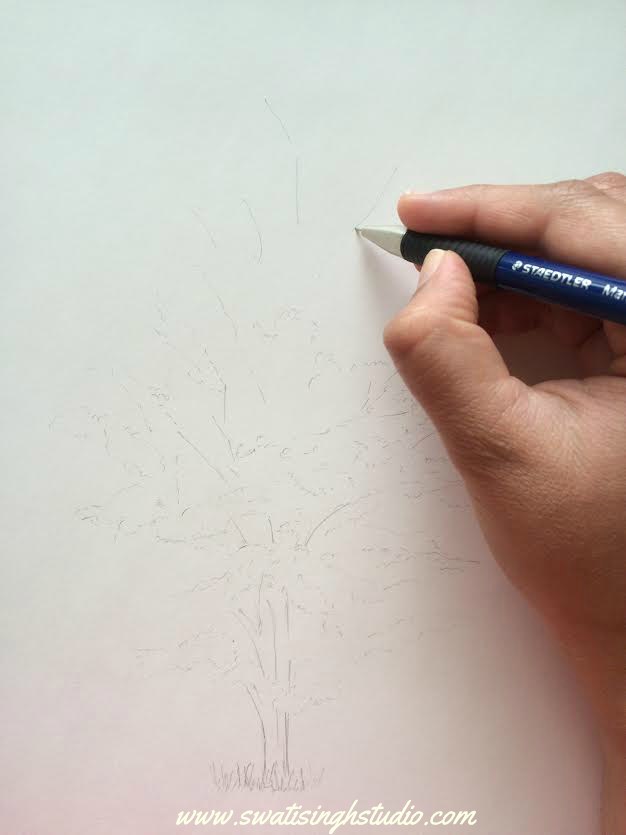
Tip: Just keep in mind to keep the overall structure wide in the middle and tapered at the top. Also leave some gaps between the clusters and add branches to connect them.
Step2: Now with the basic outline in place it’s time to draw the leaves. With a B pencil start adding the leaves inside the cluster outline, we made earlier.
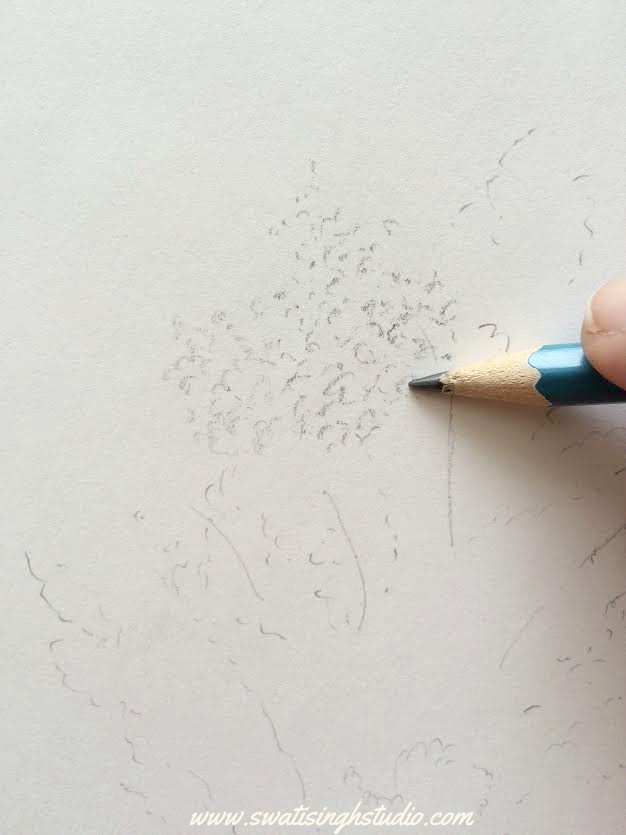
Tip: Hold the pencil close to the tip and lay it flat on the paper. Make half circles and circles to suggest leaves. Do not exert pressure, we still want it to be light at this stage.
Step3: Once you have added leaves to all the clusters, start darkening up the trunk and branches with a 4B pencil to make them look prominent.
Aspen trees have very light leaves hence we want to keep the trunk and branches the darkest overall.
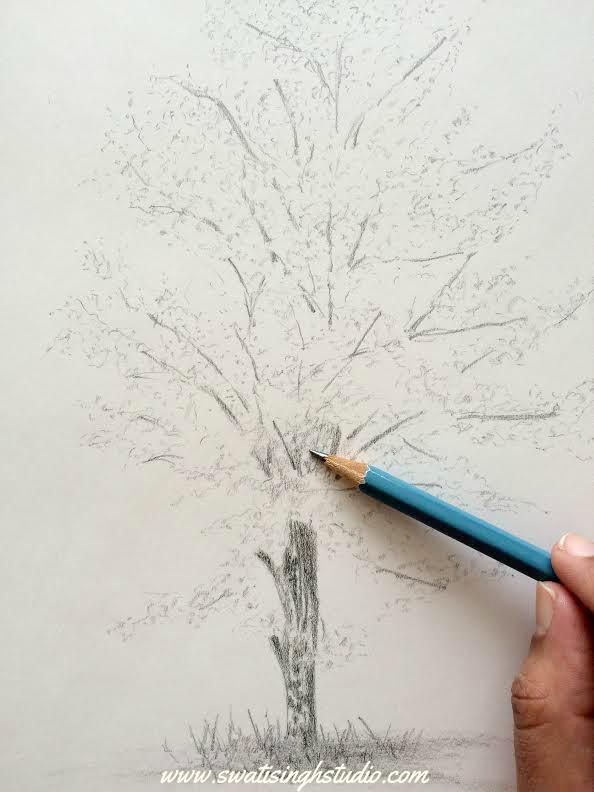
Tip: Make the trunk look interesting by adding some shadow marks of leaves on it. Make some circular marks on the trunk. This will make it look real.
You can go ahead and add ground and grass in the foreground at this stage.
Step4: Now it’s time to add some depth. With a 2B pencil shade the following areas:
-the bottom of all the clusters
-the gaps between the different clusters to make them stand apart
-and darken the bottom most clusters to suggest the shadow. The bottom most part of a tree is usually darker than the rest.
We have not jumped to 4B yet. We still are working gradually because we don’t want our leaves to turn dark.
When we separate the individual clusters with dark shades in between, the clusters stand out in the tree. Making them look lighter in color which in turn make them stand out even more.
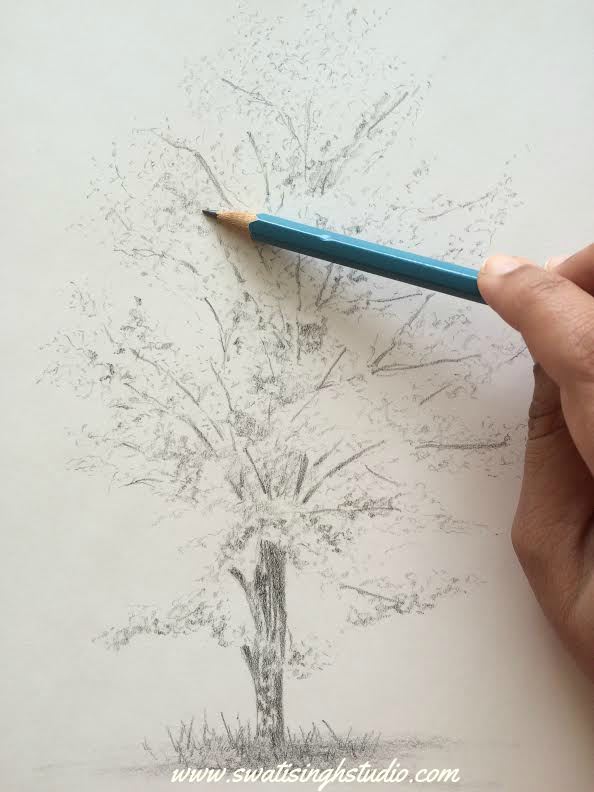
Step5: Repeat the above step with a 6B pencil. We also need to further darken the trunk and the branches with 6B pencil.
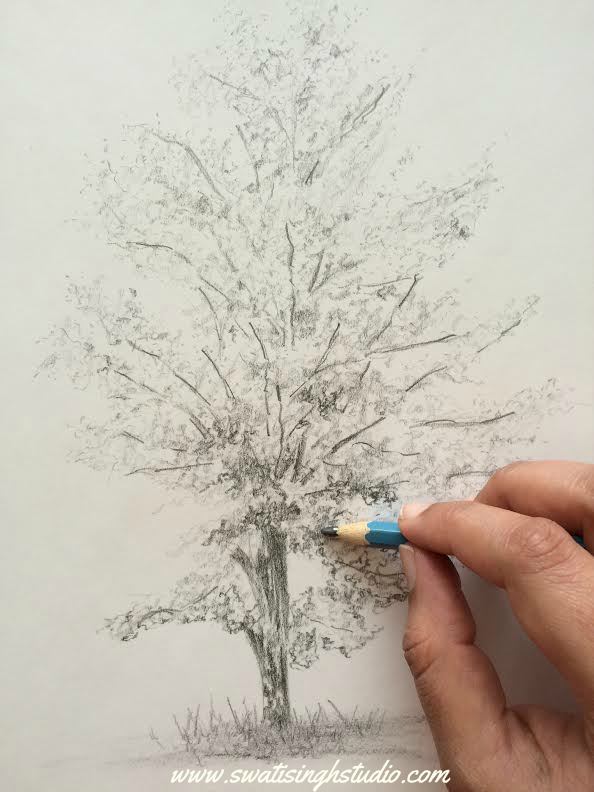
Step6: Using a 2B pencil add some more leaves to the clusters to make them look fuller. Try to keep the top most part a bit light as compared to the bottom of the tree.
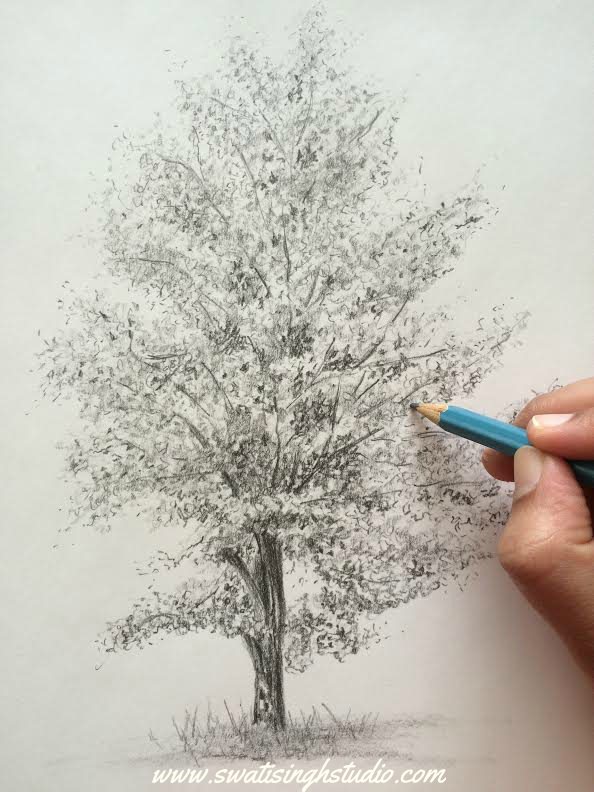
Now you are ready to sign it with your beautiful signature!
I hope you liked this step-by-step demonstration. I will come back soon with another sketch, till then enjoy sketching! Also, feel free to ask me any questions regarding this sketch. I will be more than happy to get back to you!
Swati