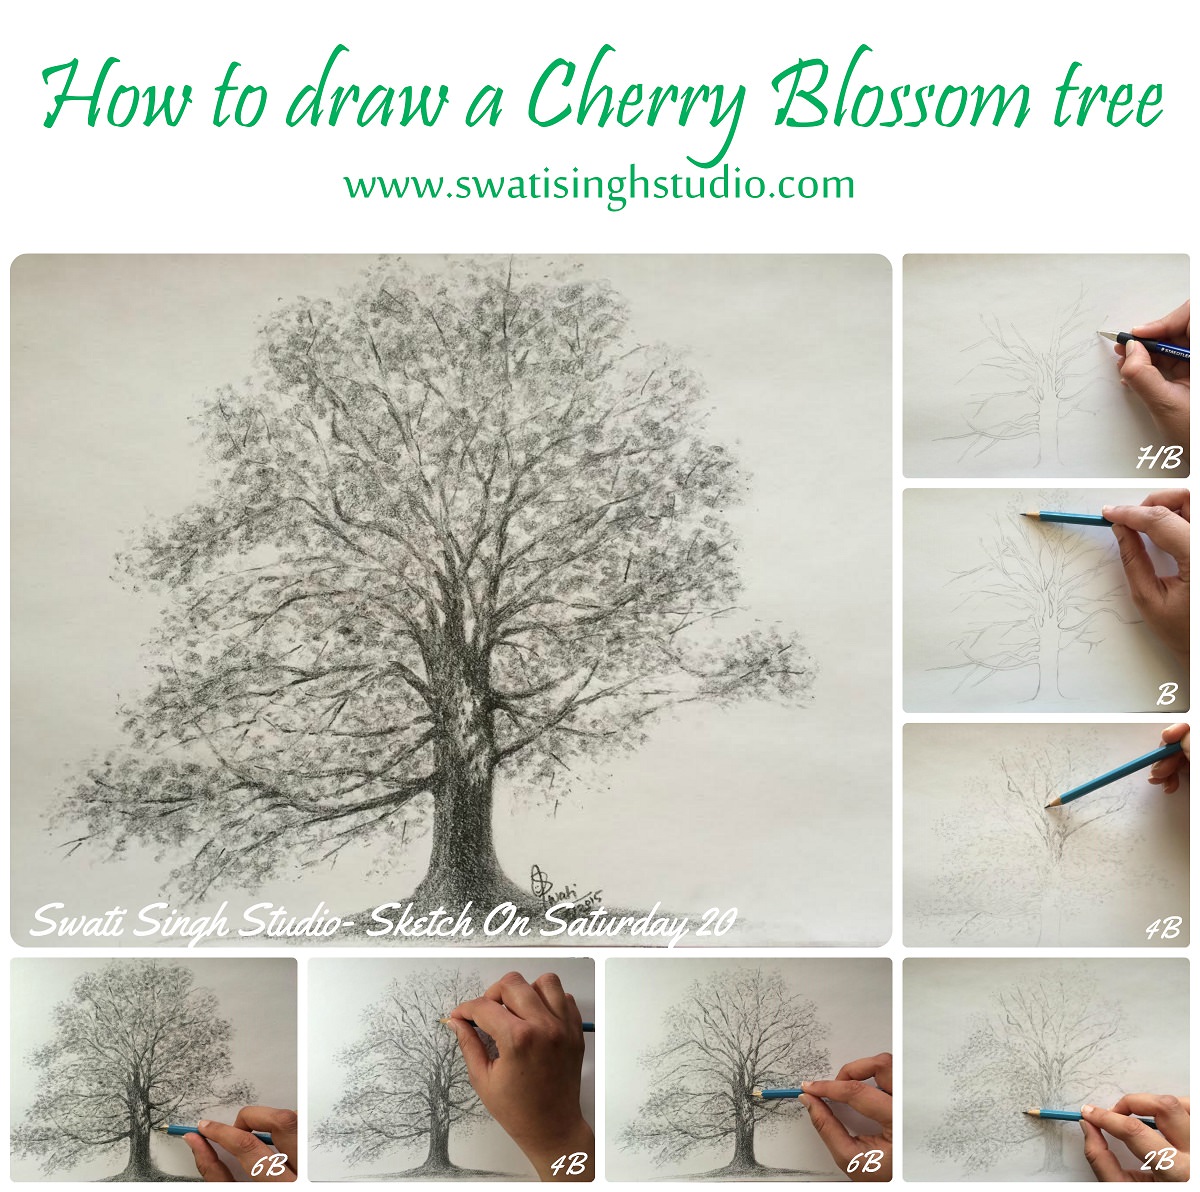
Hello everyone! Welcome back to my art blog. Spring is around the corner. Last Saturday I posted the sketch of a cherry blossom tree in the “Sketch On Saturday” series.
Well, this is the last sketch in the “Tree” series. I wanted to conclude it with a touch of spring, and what's better than drawing the beautiful cherry blossom!
Cherry blossom is speculated to be native to the Himalayas. But today they are widely distributed. Coming Saturday, we will be having the Cherry Blossom Festival here in Washington D.C. Everything about this tree is beautiful. Not only does this tree have a beautiful soft pink blossoms in spring but the overall structure of the branches is artistic in itself.
So let us look at the materials required to sketch this beauty:
1.A white sheet of paper (a sketching sheet or even a blank printing sheet will do),
2.HB, B, 2B, 4B, 6B pencils,
3.An eraser (optional),
4.A sharpener
The whole process will involve going back and forth with shading flowers and branches one by one. All we need to remember during this process is to keep the flowers lighter than the trunk.
Step1: Trunk and branches
Starting at the base we will draw the trunk with an HB pencil. Following our way up to the branches. The branches are long and curvy. Keep in mind to draw the branches thin as we divide them further into sub-branches.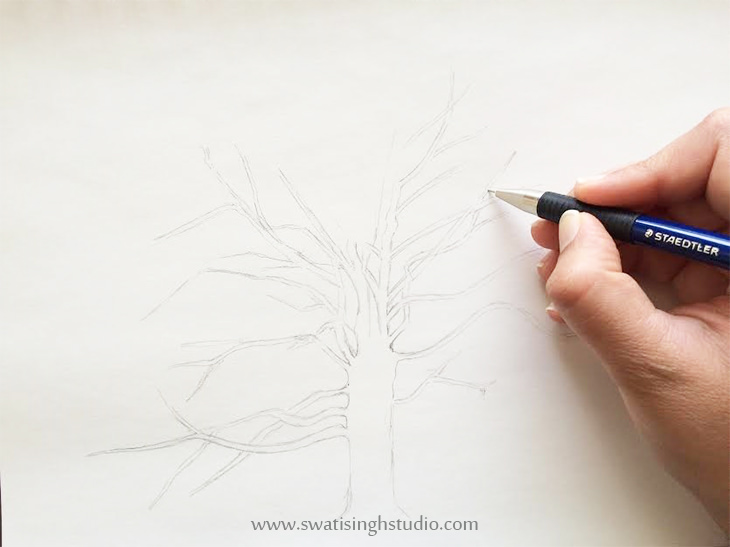
Do not worry if your tree looks creepy at this stage. It will look pretty once we add the leaves to it.
Adding branches might take some time. Just be patient and stick with it.
Tip: Feel free to use your eraser wherever needed. I know it can be tricky, especially when you have some branches crossing each other. I used it too!
Step2: Flowers and leaves
Time to add some flowers! Using a B pencil start adding flowers from the top. The flowers are very light in color as compared to the trunk and branches. So keep the marks light for now.
Hold the pencil at a distance from the tip and lay it flat on the paper as shown below. Shade with the lead falling on its side. This will make the shading process faster. It will cover more area on the paper. And holding the pencil from a distance helps in making light marks as the pressure is light on the lead.
We are not drawing individual flowers, just suggesting them with circular marks.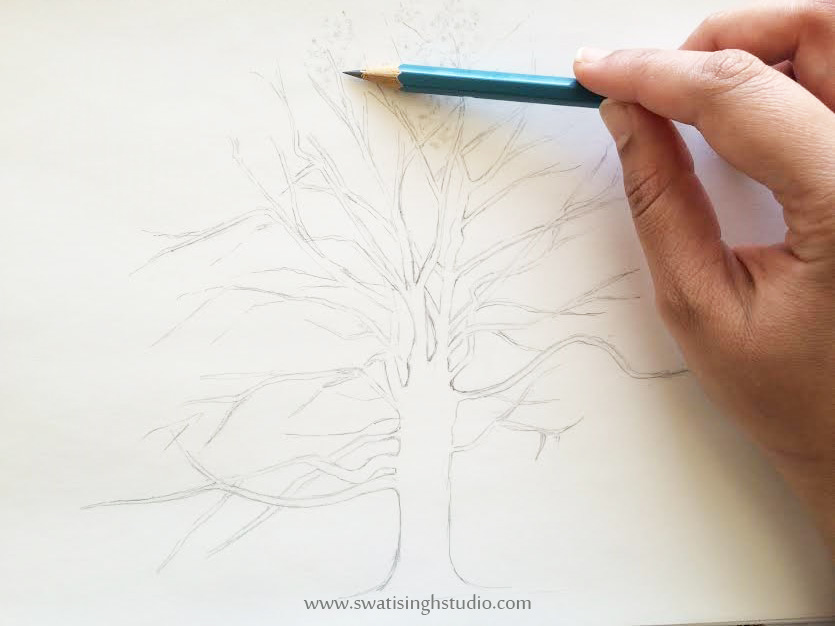
Tip: Use a sharpened pencil with a long lead. The Long lead will shade more surface area when laid flat on paper. Thus, making our job easier.
Step3: Trunk and branches
Using a 4B pencil shade the trunk and the branches darker. They should stand out.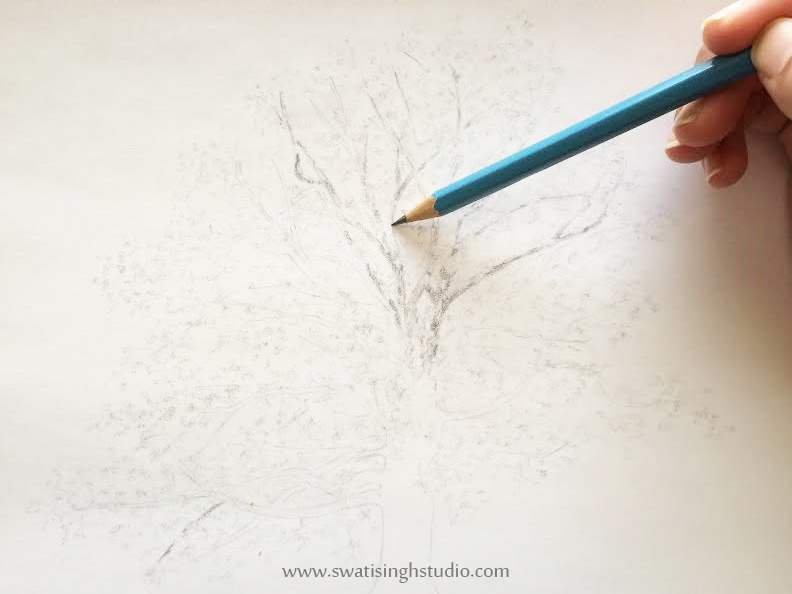
Tip: Shade it broke. Do not shade flat and solid. Leave gaps in between to suggest flowers (which are lighter than the trunk) overlapping the branches.
Step4: Flowers and leaves
Now go back and shade in the leaves with a 2B pencil as we did in Step2.
Tip: Keep the leaves denser near the branches. Scatter and lighten (the leaves) as you go away from them.
Step5: Trunk and branches
We need to darken the branches again. Probably they must have merged with the leaves we drew in the previous step, by now. So take a 6B pencil and shade the branches dark, as we did with 4B in Step3.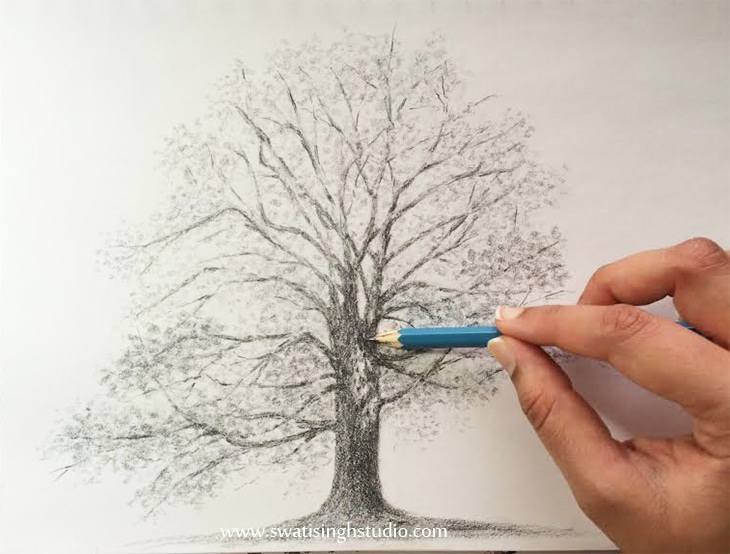
Also, go ahead and shade some ground at the base of the tree with the same pencil.
Tip: Do not forget to keep in mind the rule of broken branches. Do not draw it in a single line. Leave some gaps to show flowers on top of them. This will give it a natural look.
Step6: Flowers and leaves
Just the final tweaking of the leaves now. With a 4B pencil darken wherever you feel the need. Just keep in mind to lay the pencil flat on paper as we did earlier.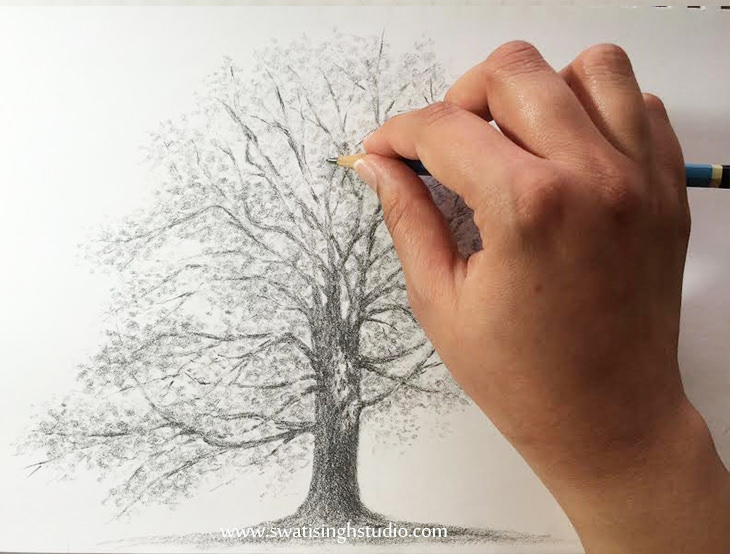
Step7: Trunk and branches
Similarly check for areas on the trunk and branches to be shaded darker. Use a 6B pencil for this. Or you can even go ahead with an 8B here if you feel the need. I did it with 6B. The rule is just to make them stand out against the flowers.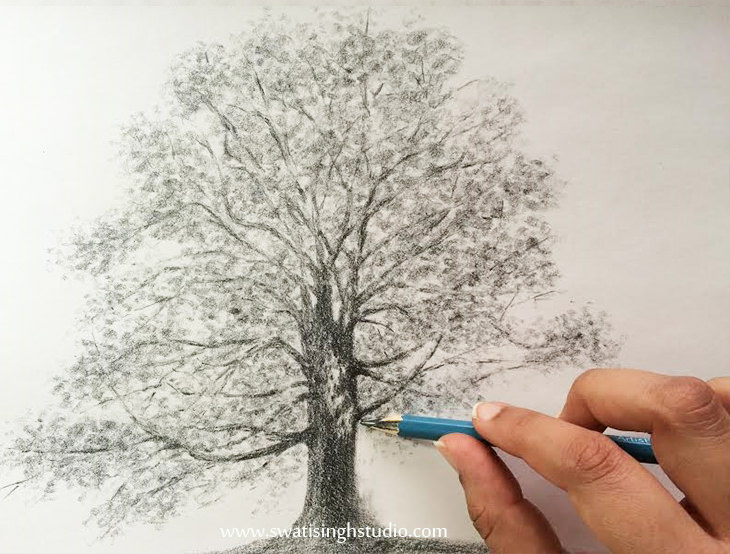
Tip: I shaded the right side of the trunk darker than the left. This shows that the light source is on the left. This gives it a 3D effect!
And viola, we are done! Hope you enjoyed this little tutorial.
I wish you a very happy and cheerful spring 2015! I hope it fills your heart with love and care.
I truly enjoyed this “Tree” series a lot. Trees are really close to my heart and they uplift my mood instantly!
I will be glad to know if these tutorials were helpful to you in any way. Please feel free to write me in the comment section below. If you have not already, I really encourage you to try out sketching a few of them at home.
I will soon post about the next “Sketch On Saturday” series. A lot more is in store for you guys. Till then enjoy this floral season to the fullest.
Happy sketching!
Swati