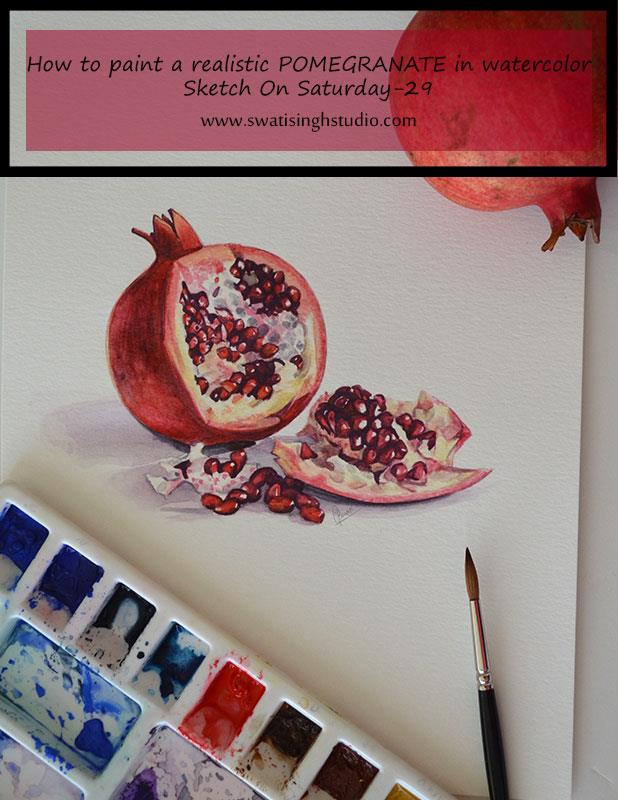
Right from the start of this “Fruit” series I was waiting eagerly to paint this extremely beautiful fruit- Pomegranate . I hope I am not sounding rude to all the other fruits I painted in the past!
Some of the reasons why I wanted to paint pomegranate are:
1. The interior: The complex structure inside this fruit is what makes it one of the most interesting fruits to study. Seeds and the membrane along with the white, fleshy pith make the interior eye-catchy!
2. The color: Red, leathery outer skin is a head turner in itself.
3. The seeds: Shiny, red seeds inside look like little gems to me! (Yes you can tell I am a Gemology student!)
Hence, here I am with one of the most complex fruits to paint in the series today.
Below is the break-up of the reference image I took.
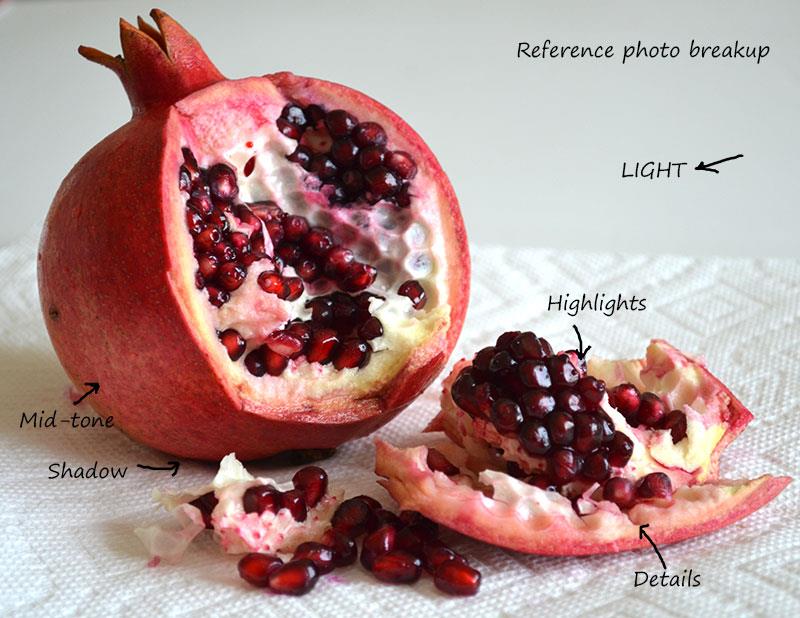
You can see the light is coming from the right and reflecting off the seeds and thereby enhancing the shine.
Painting this fruit did not require a lot of colors. The main technique involved is to vary the consistency of the paint in order to achieve various tonal values.
The thicker the paint gets the darker the tonal values are.
So keeping in mind this basic principle let us look at the colors required:
1. Lemon yellow
2. Cadmium red
3. Cadmium blue
4. Permanent rose
5. Yellow ochre
If you are new in the series you are welcome. You may check some other material required “HERE”.
So let’s begin the fun!
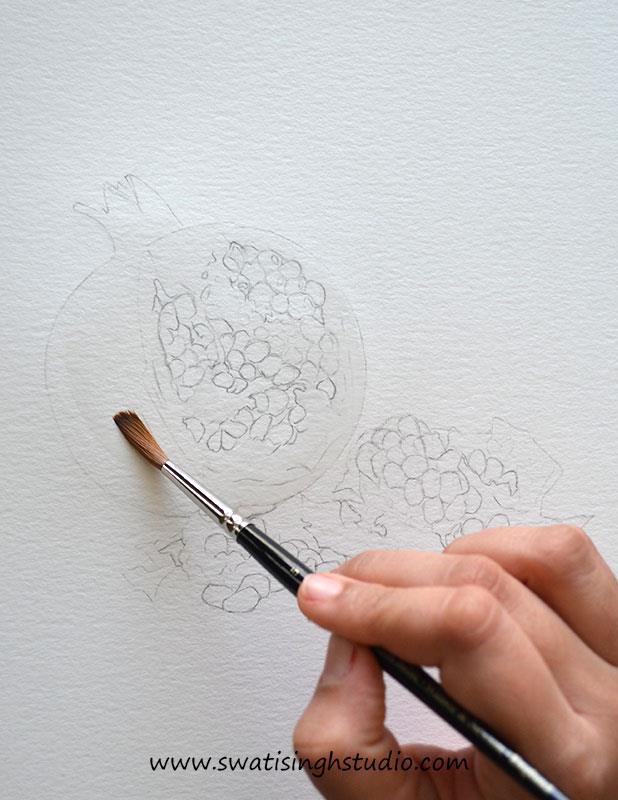
Step 1: Apply a wash of clear water inside, except the seeds using a number 5 brush.
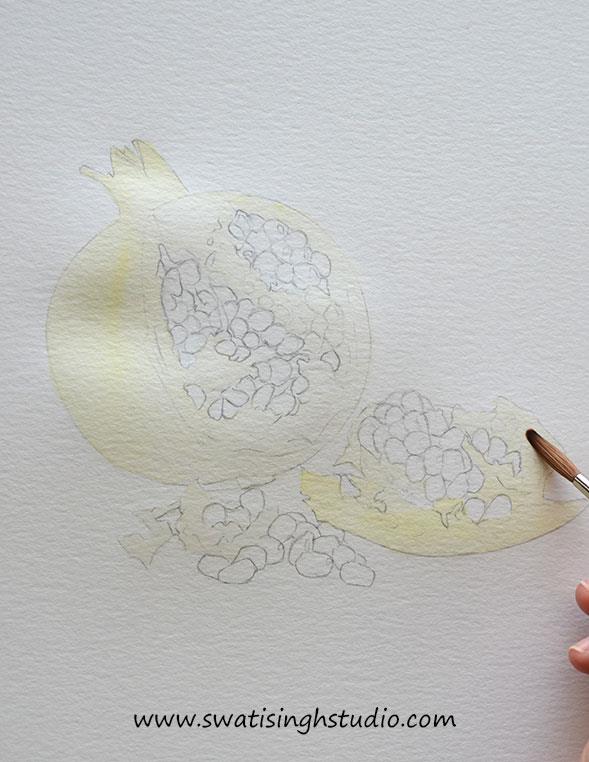
Step 2: Now add a light wash of lemon yellow in the area we applied water earlier.
Step 3: Apply a very thin wash of cadmium red on the outer skin and the seeds inside.
a) Skin: Using a no. 5 brush try to create some marks on the skin. Carefully go down with your brush strokes following the contour of the fruit. The direction matters.
b) Seeds: Carefully fill in the seeds using a no.3 brush.
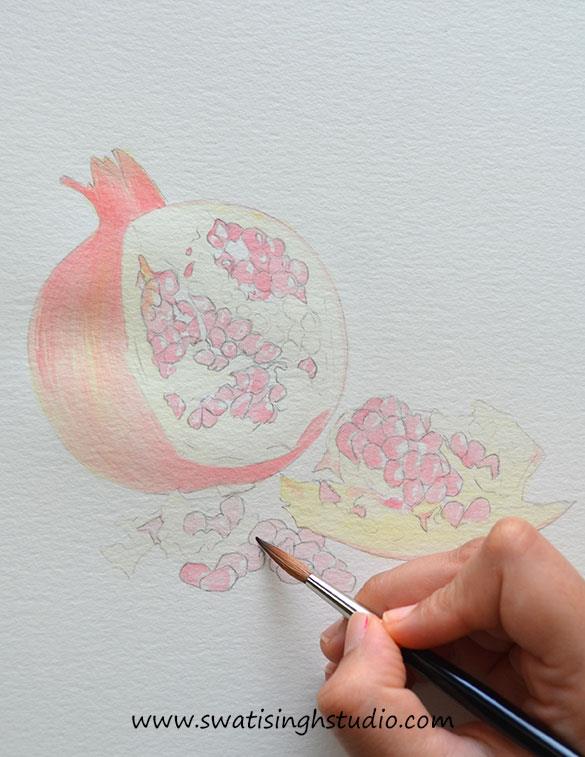
Important: Do not touch the highlights for now. Let the white of the paper show.
Step 4: If you closely observe the white, fleshy areas around the seeds, you will find some light red marks on them.
To achieve this, simply drop very thin cadmium red using a no. 3 brush.
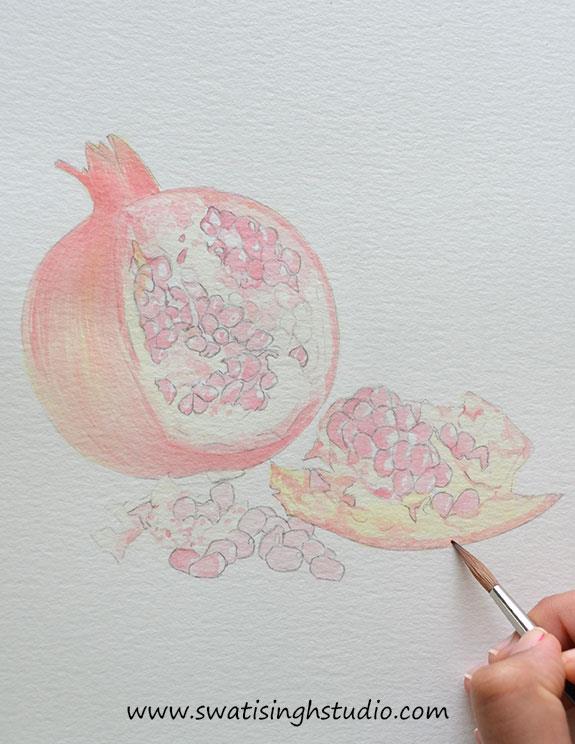
Tip: Dab excess on a tissue paper first, we need to add just a tiny amount to suggest the marks!
Step 5: Prepare a mix of cadmium red and cadmium blue in your palette, keeping the amount of red more than the blue.
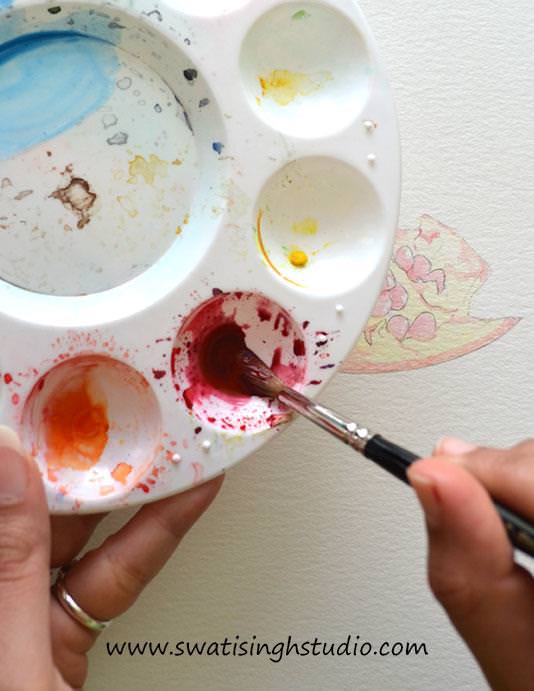
With a no. 3 brush apply this shade of color very carefully inside the seeds where you see very dark tonal values, keeping the highlights and the red areas the same.
Go ahead and some marks on the outer skin as well!
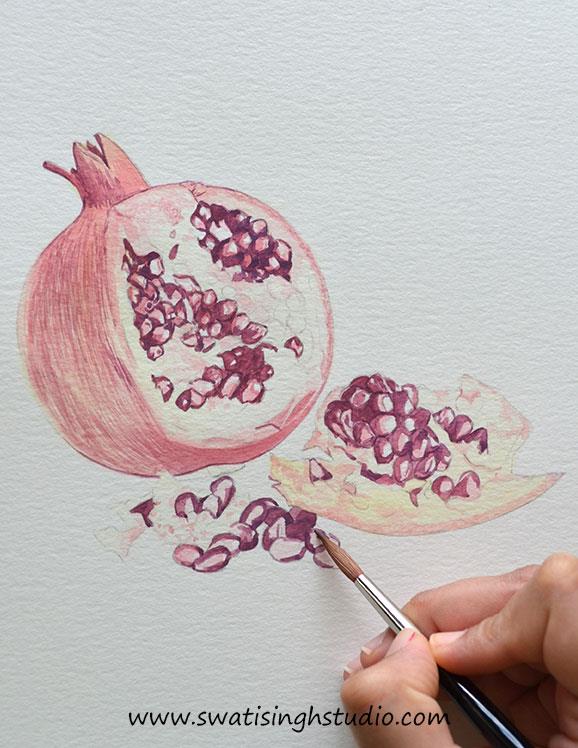
Important: Let it completely dry before proceeding to the next step.
Step 6: Apply a very light wash of permanent rose to the outer skin of the pomegranate. You may also find a few seeds with a pinkish tint. Go ahead and add it to the seeds as well.
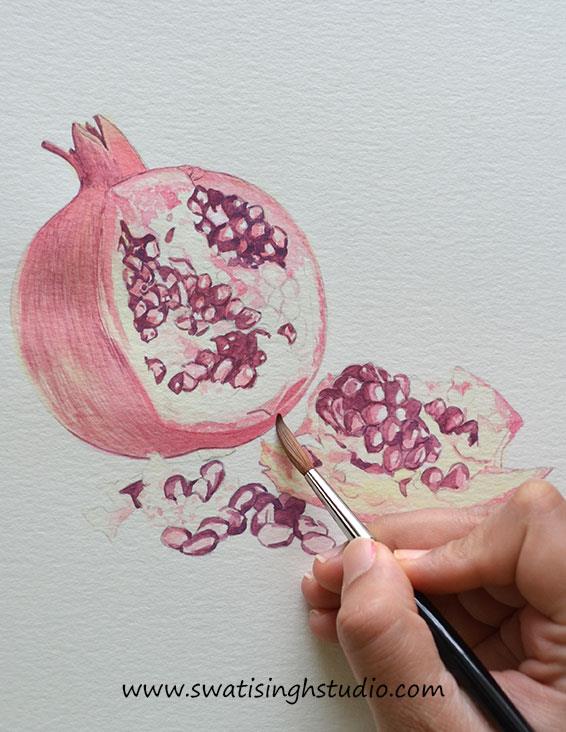
Tip: Be careful to dilute the color before applying. Permanent rose is a very strong pigment. We do not want a lot of it.
Step 7: Now add another layer of cadmium red to the seeds. This will brighten up the seeds.

Important: Be careful not to touch the highlights.
Step 8: Now with a no. 5 brush apply a thin layer of cadmium red to the outer skin. Be mindful of the tonal values. The upper and lower parts are darker than the middle one.
Hence, keep the middle portion light in tone.
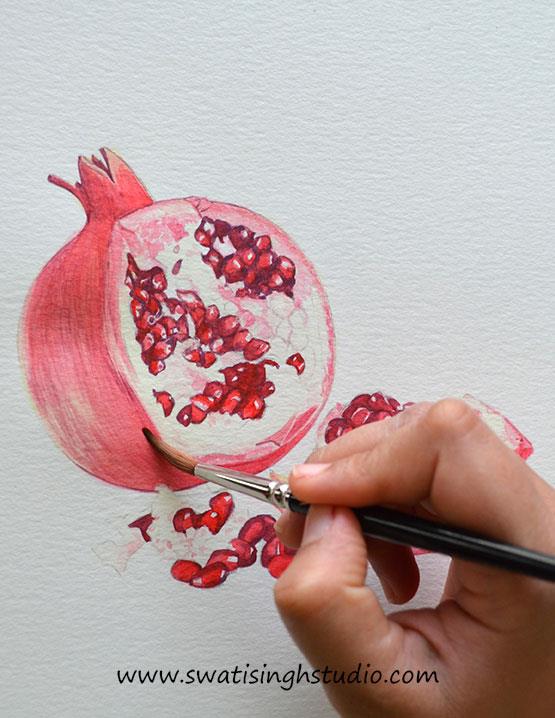
Tip: Follow the contour of the fruit while applying the color. It enhances the appearance and make it look more realistic .
Step 9: Add a very light wash of lemon yellow on the white, pulp area.
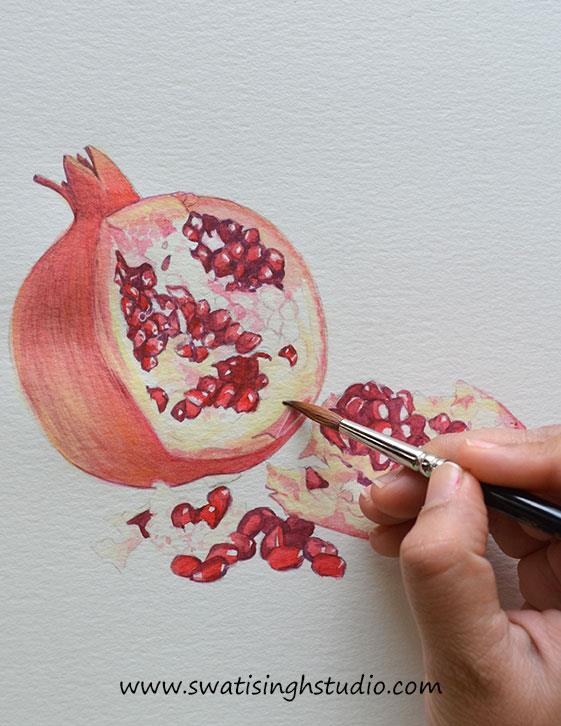
Step 10: Darken the outer skin using the dark red we made in step 5.
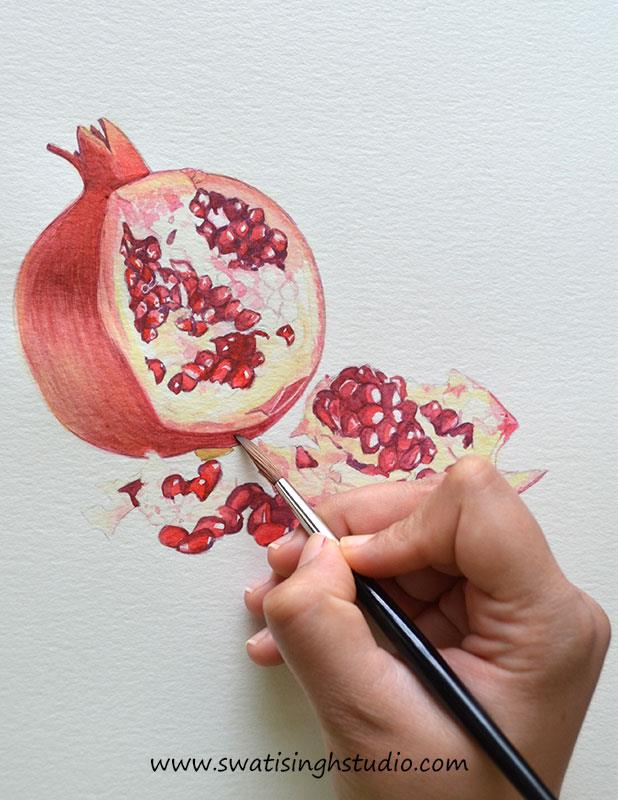
Step 11: The basic sketch is now ready. You may sit back and evaluate the tonal values again and add some fine details (using a no. 0 brush) to make it look even more realistic.
Some of the fine details I added are:
1. Fine outline around the skin
2. Some fine spots on the outer skin
3. Shadows at the base
4. Details on the membrane
5. Fine details on the white pulp area
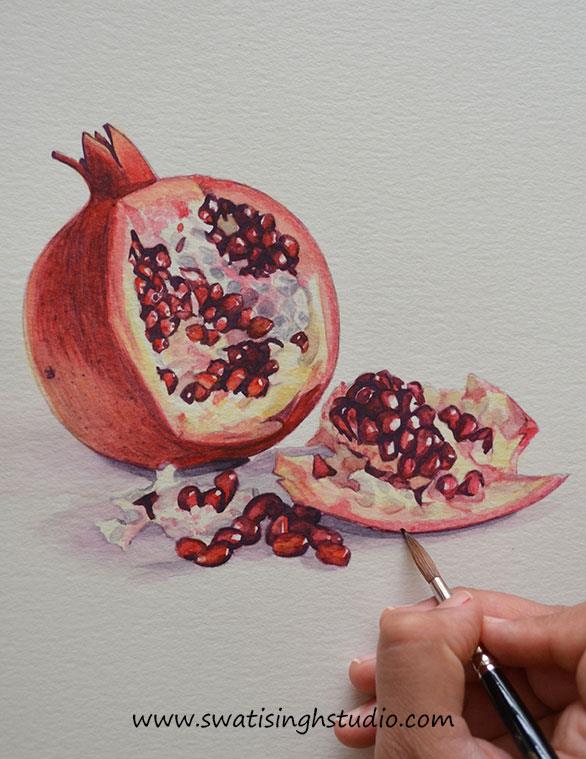
Step 12: And viola we are done. Sign off to make it your own!
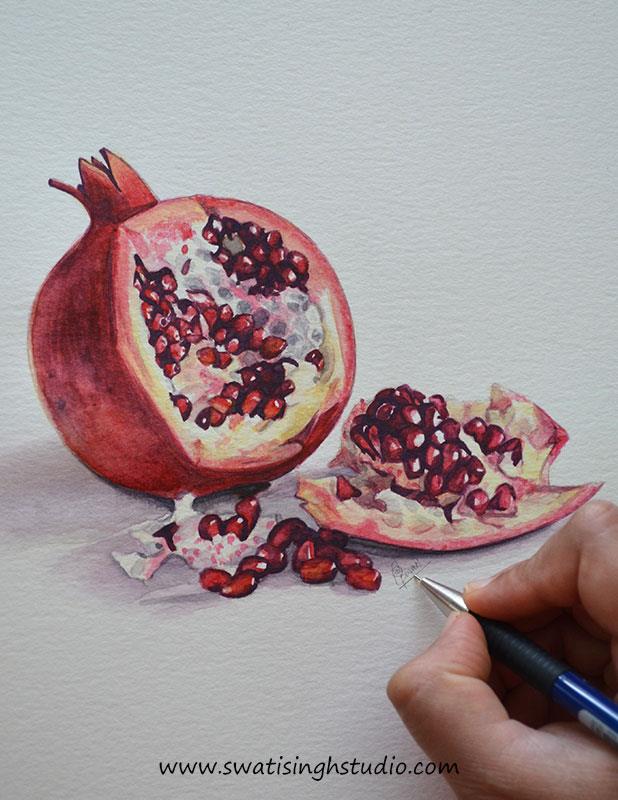
I am glad you stayed with me till the end. The whole process was time-consuming with all the details but totally worth it in the end! I loved painting this fruit.
I encourage you to try out this beautiful fruit at home and let me know how it turned out in the comment section below.
If you liked this tutorial kindly “SUBSCRIBE” to my blog and stay updated with all the future posts. You may also take a look at some previous tutorials in the series, which you can find in the index on your left.
We have come so far in the series. Just one more fruit left to explore! Time flies by so fast. I will be back with the last sketch next Saturday!
Till then enjoy water coloring!
Swati